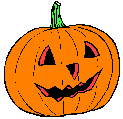
How to carve a Halloween Jack-o-Lantern - Impressive but Easy!
How to Turn ANY Photograph into a Pumpkin Carving Template!
Carve Your Own Face or any other image in a Pumpkin!
In Easy Steps!!!
That's right, you can take any photo, turn it into a pumpkin carving template and then carve a pumpkin with it! Your face, your house, school, church, almost anything! This easy, illustrated guide will show you, with text and accompanying photos, how you can easily carve a pumpkin to show your own face! All you need is:
- your picture on a computer (scanned or from your digital camera)
- ANY simple photo editor (even the free ones) and
- a printer (black and white is all you need)
Anyone can follow the instructions below to produce a professional-looking Halloween Jack-O-Lantern that looks just like you - or any other person or photo! If you've ever done a Paint-by-numbers Elvis on velvet as a child, then you can do this! It is much easier than you think, using my "patented" tips and tricks!
|
|
Portraits
Imagine how surprised your friends and family will be, when you carve a pumpkin or watermelon with their face! To create personalized portrait carving patterns, there are a few things you will need.
- Photograph with lots of shadow and contrast
- Scanner or Photo CD
- Graphics Editing Program (we use Paint Shop Pro)
- Practice!
| Step 1
Crop the area of the scanned photo you wish to
use. |
 |
| Step 2
Reduce the brightness by approximately 20% and increase the contrast by approximately 80%. |
 |
| Step 3
Reduce the number of colors to 16. Windows colors |
 |
| Step 4
Increase contrast by approximately 100%. |
 |
| Step 5
Decrease the number of colors to 2 Red components Connect any "floating" or unconnect areas shown
in black. |
 |
| Step 6
Create a negative of the image. |
 |
| Step 7
Increase the number of colors to 16 Million. This allows you to access your graphics program's advanced features. Select: Image / Edge Filters / Trace Contour |
 |
| Step 8
Reduce the number of colors to 16 (to save file size). Windows' Fill in the enclosed areas with grey. |
 |
| Click on the thumbnail to view the completed,
full size pattern.
Please note the graphics have been reduced from their original size, and the steps are presented as an example of one particular pattern. Each photograph will require slightly different color, brightness and contrast settings. Please also note that not all photographs are suitable for this process. |
Recipe and Directions
The finished pumpkin won't look too impressive until you put a light or candle in it...
And turn off the lights! Then it's pretty amazing, huh?
And you're done, Michelangelo! Put it in the window and wait for the applause!
Halloween Costumes
Here are some of the most popular Halloween costumes for children this year. For more choices, see our Halloween costumes pages.
Wizard Robe Cloak Halloween costume for Kids
Girl's Sparkle Princess Costume - In pink, for small girls
Sew your own Halloween Costumes with Patterns from the Singer Sewing Reference Library
Pizza Costume for Kids - A giant slice of pizza Halloween Costume for Children and Teens
Find Related Information and Resources Here!
Here's the quick list to related farms for PYO, Honey, Pumpkins, Christmas trees, etc.:
You may find these websites useful!
Local pick your own farms for apples, strawberries, raspberries, corn, tomatoes, etcr
Farm markets and roadside stands
Road tripping and camping tips, tricks and How-to's
Venues for you event: Farms, Wineries, Orchards for your event, wedding or party
Festivals: Fruit and vegetable festivals
Winery tours and wine tastings
Horses: rides, stables, lessons, trails
Maple Syrup farms and sugarworks
Bed and Breakfasts on Farms, Wineries, Ranches and Orchards
Water bath canning kit - 8 Piece Enamelware Pot with Canning kit and Rack. Canning Supplies Starter Kit
Double Donut Pumpkin Spice Coffee Pods, Single Serve Flavored Coffee for Keurig K Cups Machines,
Pumpkin Spice - Organic, 1.94-Ounce Jar, Nutmeg, Cloves, Ginger & Cinnamon, Enhances Tea, Seasoning, Kosher
Maud's Pumpkin Spice Instant Latte - 16 count Packets, Love Me Some Pumpkin Spice Latte
Pumpkin Pie Spice Blend Extract,McCormick Pure
Don't miss our page of costumes, ready made and ones you can make yourself!
And here's a book of 130 pumpkin carving stencils!
Pumpkin Carving stencils book - Over 130 Halloween jack olantern pumpkin designs. Including Witches, Cats, skulls, bats, ghosts, and so much more
More carving kits and stencils are here!
Find Other types of farms:
Farm markets and roadside stands
Get the
most recent version of
the Ball Blue Book
Click here to get Halloween Costumes delivered - fast, great prices!
Click here to get Halloween Costumes delivered - fast, great prices!
Find Other types of farms:
Farm markets and roadside stands
Get the
most recent version of
the Ball Blue Book