How to make a pumpkin pie... from a real pumpkin, and with no added sugar! (directions, recipe, with photos and free)
 How to Make Homemade Pumpkin Pie - from a Real Pumpkin, Not a Can,
with No Added Sugar!
How to Make Homemade Pumpkin Pie - from a Real Pumpkin, Not a Can,
with No Added Sugar!
You probably take canned pumpkin for granted.
You're there, the can is there, there's a pumpkin on the label... open it and
mix it up with spices to make a pie, right? Ah, but a pumpkin pie made
from a fresh pumpkin tastes so much better than the glop that was processed last
year! And perhaps you are diabetic or otherwise need to cut down on sugar and
carbs? Here's how to do it, complete instructions in easy steps and
completely illustrated. And it is much easier than you think, using my
"patented" tips and tricks!
Click here for a PDF print version
Directions for Making No-Added Sugar Pumpkin Pie from Scratch
Ingredients
- a pie pumpkin (see step 1)
- Stevia (prepared form, like Truvia) or Splenda
- 1.5 teaspoon ground cinnamon
- 1 teaspoon ground cloves
- 1 teaspoon ground allspice
- one half teaspoon ground ginger
- one half teaspoon salt (optional, I don't use any)
- 4 large eggs
- 3 cups pumpkin glop (ok... "sieved, cooked pumpkin")
- 1.5 cans (12oz each) of evaporated milk (I use the nonfat version)
Equipment
- A sharp, large serrated knife
- an ice cream scoop
- a large microwaveable bowl or large pot
- Pie crust (Click here for illustrated pie crust instructions! they will open in a new window)
- See step 9 for the spices and other ingredients
Recipe and Directions
Step 1 - Get your pie pumpkin
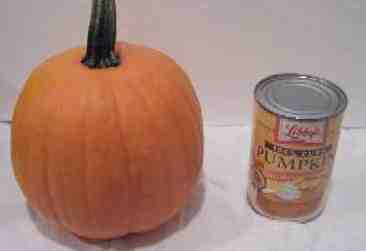 "Pie pumpkins" are smaller, sweeter, less
grainy textured pumpkins than the usual jack-o-lantern types.
grocery stores usually carry them in late September through December in
the U.S. Note: the Libby's can of cooked pumpkin is just there
for reference - it is the small can, so that gives you an idea of the size
of a typical pie pumpkin. They're only about 8 inches in diameter.
"Pie pumpkins" are smaller, sweeter, less
grainy textured pumpkins than the usual jack-o-lantern types.
grocery stores usually carry them in late September through December in
the U.S. Note: the Libby's can of cooked pumpkin is just there
for reference - it is the small can, so that gives you an idea of the size
of a typical pie pumpkin. They're only about 8 inches in diameter.
Just like selecting any squash, look for one that is firm, no bruises or soft spots, and a good orange color.
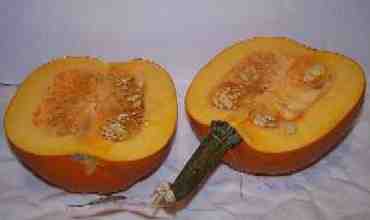
Step 2 - Prepare the pumpkin for cooking
 Wash the exterior of the pumpkin in cool or
warm water, no soap.
Wash the exterior of the pumpkin in cool or
warm water, no soap.
Cut the pumpkin in half. A serrated knife and a sawing motion works best - a smooth knife is more likely to slip and hurt you!
Step 3 - Scoop out the seeds...
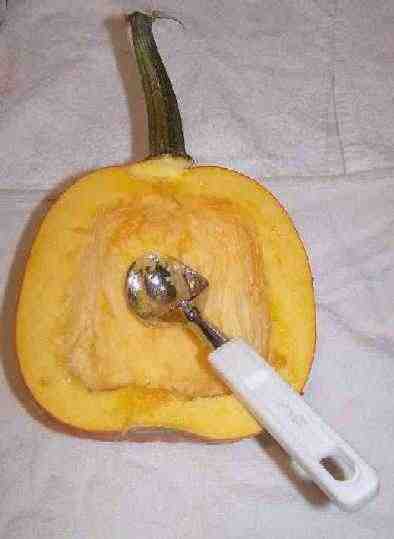 And scrape the insides. You want to
get out that stringy, dangly stuff that coats the inside surface. I
find a heavy ice cream scoop works great for this.
And scrape the insides. You want to
get out that stringy, dangly stuff that coats the inside surface. I
find a heavy ice cream scoop works great for this.
Note: SAVE THE SEEDS:
The seeds can be used either to plant pumpkins next year, or roasted to eat this year! Place them in a bowl of water and rub them between your hands. then pick out the orange buts (throw that away) and drain off the water. Spread them out on a clean towel or paper towel to dry and they're ready to save for next year's planting or roast. Click here for roasting instructions! (opens in a new window)
Step 4 - Put it in a microwaveable bowl
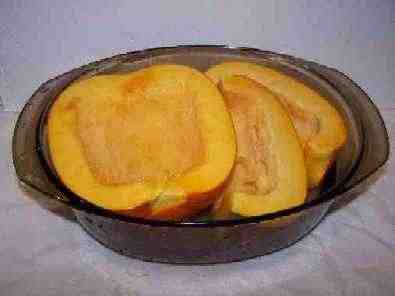 Remove the stem, and put the pumpkin into a
microwaveable. You may need to cut the pumpkin further to make it fit.
The fewer the number of pieces, the easier it will to scoop out the cooked
pumpkin afterwards.
Remove the stem, and put the pumpkin into a
microwaveable. You may need to cut the pumpkin further to make it fit.
The fewer the number of pieces, the easier it will to scoop out the cooked
pumpkin afterwards.
Put a couple of inches of water in the bowl, cover it, and put in the microwave.
Step 5 - Cook the pumpkin until soft
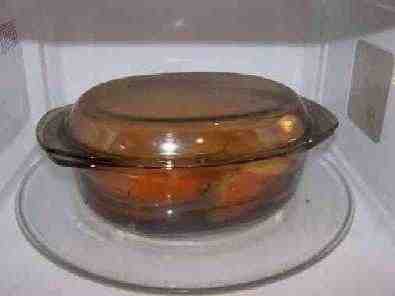 Cook for 15 minutes on high, check to see if
it is soft, then repeat in smaller increments of time until it is soft
enough to scoop the innards out. Normally it takes 20 or 30 minutes
in total.
Cook for 15 minutes on high, check to see if
it is soft, then repeat in smaller increments of time until it is soft
enough to scoop the innards out. Normally it takes 20 or 30 minutes
in total.
Note: You CAN cook it on the stovetop; it will just take longer (almost twice as long)
Step 6 - Scoop out the cooked pumpkin
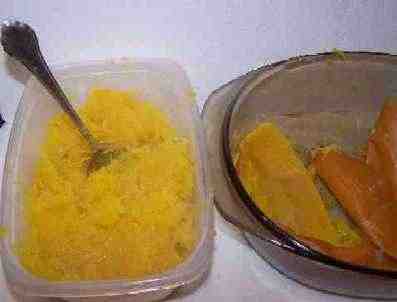 Using a broad, smooth spoon, (such as a
tablespoon) gently lift and scoop the cooked pumpkin out of the skin.
It should separate easily an in fairly large chucks, if the pumpkin is
cooked enough.
Using a broad, smooth spoon, (such as a
tablespoon) gently lift and scoop the cooked pumpkin out of the skin.
It should separate easily an in fairly large chucks, if the pumpkin is
cooked enough.
Step 7 - Puree the pumpkin
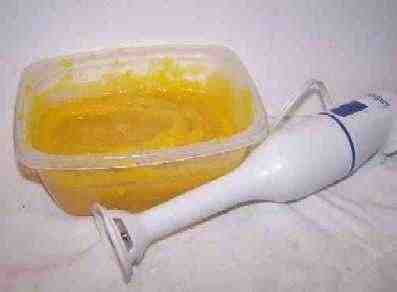 To get a nice, smooth consistency, I use a
Pillsbury hand blender. A regular blender works, too (unless you
made a few frozen daiquiris and drank them first..). Or even just a hand
mixer with time and patience.
To get a nice, smooth consistency, I use a
Pillsbury hand blender. A regular blender works, too (unless you
made a few frozen daiquiris and drank them first..). Or even just a hand
mixer with time and patience.
With the hand blender, it just takes 2 or 3 minutes!
Step 7 - Done with the pumpkin!
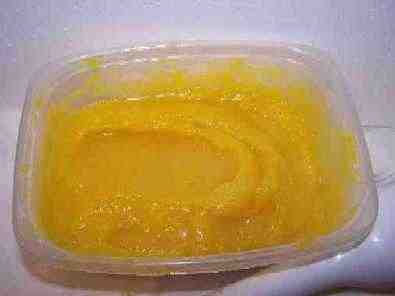 The pumpkin is now cooked and ready for the
pie recipe. Get the frozen daiquiris out from step 7 and take a
break! :)
The pumpkin is now cooked and ready for the
pie recipe. Get the frozen daiquiris out from step 7 and take a
break! :)
Step 8 - Make the pie crust
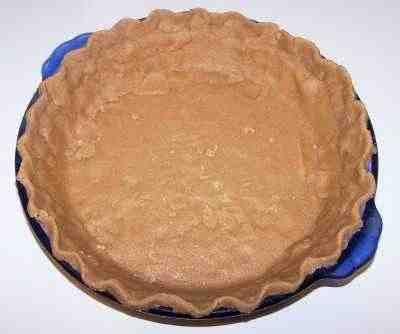 Yes, I know there are ready-made pie crusts
in the frozen section at the store, but they really are bland and doughy.
A flaky crust is easy to make!~
Yes, I know there are ready-made pie crusts
in the frozen section at the store, but they really are bland and doughy.
A flaky crust is easy to make!~
It is also time to start preheating the oven. Turn it on and set it to 425 F (200 C, for those in Europe)
Click here for illustrated pie crust
instructions!
(it will open in a new window)
Step 9 - Mix the pie contents
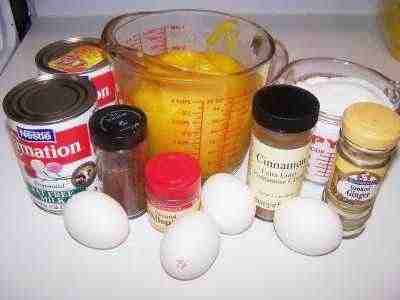 All the hard work is behind you! Here's
where it gets really easy. If you start with a fresh 8" pie pumpkin, you
will get about 3 cups of cooked, mashed pumpkin. The right amount of
ingredients for this is as follows:
All the hard work is behind you! Here's
where it gets really easy. If you start with a fresh 8" pie pumpkin, you
will get about 3 cups of cooked, mashed pumpkin. The right amount of
ingredients for this is as follows:
- 1 cup Stevia (in the prepared form, like Truvia) or Splenda
(Note: don't use NutraSweet [aspartame]. It won't work, as it breaks down when you cook with it) - 1.5 teaspoon ground cinnamon
- 1 teaspoon ground cloves
- 1 teaspoon ground allspice
- one half teaspoon ground ginger
- one half teaspoon salt (optional, I don't use any)
- 4 large eggs
- 3 cups pumpkin glop (ok... "sieved, cooked pumpkin")
- 1.5 cans (12oz each) of evaporated milk (I use the nonfat version)
Mix well using a hand blender or mixer.
Step 10 - Pour into the pie crust
 I like a deep, full pie, so I fill it right
up to about one quarter to one half inch from the very top.
I like a deep, full pie, so I fill it right
up to about one quarter to one half inch from the very top.
Don't be surprised if the mixture is very runny! It may start as a soupy liquid, but it will firm up nicely in the oven! Note: the pie crust is brown because I used whole wheat flour! Tastes the same but is healthier.
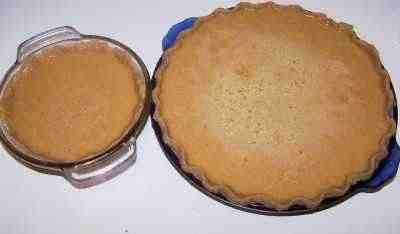
TIP: What do you do if you end up with more filling than will fit in your pie crust(s)? Easy! Of course, you can make another, smaller pie crust and fill a small pie pan... or just grease any baking dish, of a size that the extra filling will fill to a depth of about 2 inches (see the photo at right), and pour the extra filling in.. then bake it. It will be a crustless pumpkin pie that kids especially love!
Step 11 - Bake the pie
Bake at 425 F (210 C ) for the first 15 minutes, then
turn the temperature down to 350 F ( 175 C ) and bake another 45 to
60 minutes, until a clean knife inserted into the center comes out
clean.
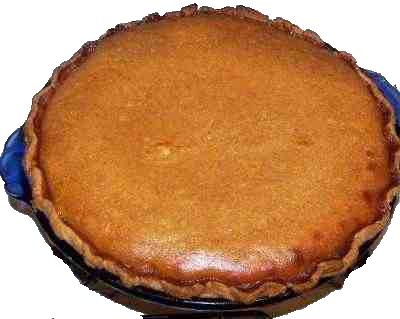
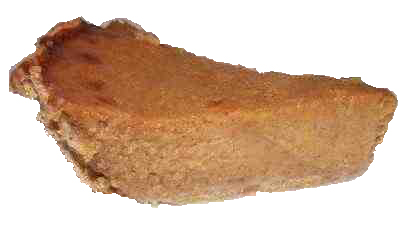
Here is the finished pie, right out of the oven:
I use a blunt table knife to test the pie. The below has already been stuck in the pie, and you see it comes out pretty clean, when the pie is done.

Step 12 - Cool the pie
And enjoy!
 Especially
with whipped cream!
Especially
with whipped cream!
Halloween Costumes
Here are some of the most popular Halloween costumes for children this year. For more choices, see our Halloween costumes pages.
Wizard Robe Cloak Halloween costume for Kids
Girl's Sparkle Princess Costume - In pink, for small girls
Sew your own Halloween Costumes with Patterns from the Singer Sewing Reference Library
Pizza Costume for Kids - A giant slice of pizza Halloween Costume for Children and Teens
Find Related Information and Resources Here!
Here's the quick list to related farms for PYO, Honey, Pumpkins, Christmas trees, etc.:
You may find these websites useful!
Local pick your own farms for apples, strawberries, raspberries, corn, tomatoes, etcr
Farm markets and roadside stands
Road tripping and camping tips, tricks and How-to's
Venues for you event: Farms, Wineries, Orchards for your event, wedding or party
Festivals: Fruit and vegetable festivals
Winery tours and wine tastings
Horses: rides, stables, lessons, trails
Maple Syrup farms and sugarworks
Bed and Breakfasts on Farms, Wineries, Ranches and Orchards
Water bath canning kit - 8 Piece Enamelware Pot with Canning kit and Rack. Canning Supplies Starter Kit
Double Donut Pumpkin Spice Coffee Pods, Single Serve Flavored Coffee for Keurig K Cups Machines,
Pumpkin Spice - Organic, 1.94-Ounce Jar, Nutmeg, Cloves, Ginger & Cinnamon, Enhances Tea, Seasoning, Kosher
Maud's Pumpkin Spice Instant Latte - 16 count Packets, Love Me Some Pumpkin Spice Latte
Pumpkin Pie Spice Blend Extract,McCormick Pure
Don't miss our page of costumes, ready made and ones you can make yourself!
And here's a book of 130 pumpkin carving stencils!
Pumpkin Carving stencils book - Over 130 Halloween jack olantern pumpkin designs. Including Witches, Cats, skulls, bats, ghosts, and so much more
More carving kits and stencils are here!
Find Other types of farms:
Farm markets and roadside stands
Get the
most recent version of
the Ball Blue Book
Click here to get Halloween Costumes delivered - fast, great prices!
Click here to get Halloween Costumes delivered - fast, great prices!
Find Other types of farms:
Farm markets and roadside stands
Get the
most recent version of
the Ball Blue Book